Showing posts with label stamping. Show all posts

Feb 10, 2018

NEW VIDEO: Gelli Printed, Stamped and Collaged Cards

Hi creative lovelies!

RubberMoon Art Stamps has published another project from moi:

You're gonna be so proud of me because I created a...

That's right. I'm really enjoying the whole process of filming, editing + yes, being in front of the camera, for a change ;-)


Gelli Printed, Stamped and Collaged Cards video tutorial
Gelli Printed, Stamped and Collaged Cards by Martice Smith Fine Art + Design
Watch the video here: http://bit.ly/CollagedHolidayCards

This project is step-by-step, super fun + whimsical set of cards that I made from leftover scraps of stenciled gelli prints.

These were gifted as Christmas cards but you can use these same techniques to make your cards for, just about, any occasion.

Here's the general supply list:
  • Stamps (RubberMoon)
  • White cardstock, cut down to size of card you want to make
  • Stack of gelli prints
  • Neon fluorescent acrylic paint in an applicator bottle (I’m using Sizzling Pink by DecoArt Americana Acrylic)
  • Adhesive / Matte Medium
  • Foam dots (to add dimension)
  • Small paintbrush
  • Permanent Ink pads (black and gold)
  • Scissors

Grab your supplies + come play with us over on the RubberMoon Artmosphere blog!

Gelli Printed, Stamped and Collaged Cards video tutorial
Gelli Printed, Stamped and Collaged Cards by Martice Smith Fine Art + Design
Watch the video here: http://bit.ly/CollagedHolidayCards

P.S. If you haven't already, I'd LOVE for you to give me a little boost of love + confidence over my YouTube channel. Don't forget to subscribe + click on the bell icon to receive alerts whenever I drop a new video!! Thank youuuu


Apr 15, 2017

April Art Challenge Days 11-15, Plus a Roundup!

I feel like I can be honest with you - we are art sistas after all, right?

I cried happy tears this past weekend. Sure did. I'll tell you why...

A sweet lady, who is participating in the 30 day challenge, reached out to me to share her experience with the art challenge. She's given me permission to share her words:

"Martice, I can not tell you how much I love your 30 day art challenge! Your prompts are the best ones I've come across and they have given me the motivation to get up and create something. I am thankful to have found a fellow artist who leaves such thoughtful, generous comments on my art. You are a true example of what I aspire to as a professional artist. I have hidden my love for painting for the past 5 years. Yesterday, I decided to show my husband what I painted for the day 5 (spirit animal) prompt. He was shocked at the amount of detail I put into it! He also said that I should have it framed so we could hang it up in our living room!"

AH-MAZING, right?! Watching someone get past their fears to reach their breakthrough is nothing short of a miracle.

Want to join in? It's never too late.
Get all the details for the 30 day art challenge HERE.


Here's the cover of my board book for this 30 day challenge!
Click HERE to see a step out tutorial: How to Layer Jane Davenport Collage Papers.

 Tutorial: How to Layer with Collage Paper

Take a look at how I've been tackling each prompt...

DAY 11: DEEP IN THE OCEAN


DAY 12: STREET


DAY 13: CRYSTALLIZE


DAY 14: VINE


DAY 15: SOMETHING FUNNY


 Download prompt list

  SHARE THE INSPIRATION!  

Here is a roundup from people who are joining in, from all over the wooorld!


Guessing game time!! See if you can you match the artwork with its prompt.  


Curious to see what other artists are creating? While you're visiting Instagram, search for the hashtag #MarticeSmithArtdaily30 or click here:


Remember: you can start with DAY 1 or skip around to any prompt that speaks to you. Just have FUN!

 Download prompt list

Apr 10, 2017

April Art Challenge Days 6-10, Plus a Roundup!

:: Trumpet fanfare ::

We made it past the first week of our challenge! Woohoo!

I am blessed + completely in awe of the participation + encouragement that's been shared during this challenge.


Want to join in? It is never too late.
Get all the details for the 30 day art challenge HERE.


Here are two things I love about this challenge:
1. working on a smaller scale (Most of the time, I'm working on 9x12 or larger if it's commissioned pieces.) There's not a lot of pressure, which means, I get to enjoy being in the moment, creating something that makes me smile.

2. cheering for other people! I'm as proud as a mama hen when I look at the work that's being created under the hashtag #MarticeSmithArtdaily30. I make an effort to respond to EVERYONE'S posts. I leaving thoughtful comments - not what you might expect, right?! Well, I like to let you know what moves me, what makes me say 'You go, chica! You are rockin' this prompt!' Emojis can only say so much...

Take a look at how I've been tackling each prompt...

DAY 6: SPLASH

DAY 7: REVERSE

DAY 8: STAMP

DAY 9: PATTERN PLAY

DAY 10: LEAST FAVORITE FOOD


 Download prompt list

SHARE THE INSPIRATION!

Here is a roundup from people who are joining in, from all over the wooorld!

Guessing game time!! See if you can you match the artwork with its prompt.  


Curious to see what other artists are creating? While you're visiting Instagram, search for the hashtag #MarticeSmithArtdaily30 or click here:

View photos from #MarticeSmithArtdaily30 on Instagram


Remember: you can start with DAY 1 or skip around to any prompt that speaks to you. Just have FUN!

download art prompts

Feb 27, 2015

Handmade Foam Stamps and Printing Plates

Ever wonder how to create your own printing plates for printmaking? What about designing unique foam stamps? If so, I have just the tutorial, for you!

Learn how to make your own stamps in under 5 minutes with BASIC supplies. Seriously, you probably have these things around the house...somewhere.

Unleash your creativity by adding layers of patterns and textures to your art!
(The full tutorial has been published over on the Creating Mixed Media Art website.)

Handmade Foam Stamps and Printing Plates

Basic supplies you will need: 
• a sturdy backing, like cardboard
• scissors
• craft foam (you can get this at your local craft supply store; I purchased mine from a Dollar Tree.
  A package of 20 sheets for $1!)


After working through this new tutorial, you will have created one-of-a-kind collage backgrounds using handmade foam stamps and printing them on delicate surfaces and baby wipes. (Yup, baby wipes...clean ones only ;-)

Handmade Foam Stamps and Printing Plates; tutorial by Martice Smith II

Handmade Foam Stamps & Printing Plates | full tutorial RIGHT HERE 


http://www.marticesmithart.com/newsletter


Aug 5, 2014

I am going to the MOON!!!

Well, not literally...but I do have some amazing news I'd love to share with you:

It's official and at last, I can shout-it-from-the-rooftops that: I've been selected to join the creative design team of RubberMoon Stamps!!! Eeeeeekkkk! What a blessing - I'm so honored to be part of this amazing company. 

*** A big 'THANKS' to Kae Pea and the selection committee for this opportunity. ***

It seems a li'l bit ironic, due to the fact that I LOVE gazing up at the moon, day and night. The moon is so mesmerizing and hypnotic to me. I have created some of my best work in the wee hours of the night; just me and the luminous moonlight. All I can say is this: It was meant to be for me!

Martice makes the RubberMoon Creative Dream Team!
RubberMoon | Creative Dream Team

Martice makes the RubberMoon Creative Dream Team!


I'm one of the 6 new people they've chosen, from over 40 submissions! Wow! Someone pinch me!  Also, some of the alumni (past RubberMoon contributors) will be joining, as well. Our term starts this month and ends in December.

You can find my posts, once a month, on their blog...my first project will be published later this month!

Please click here to meet all of our team members. I think you will be impressed!

Make sure you visit the RubberMoon blog every Tuesday and Friday to see our art projects and be inspired!


http://www.marticesmithart.com/newsletter

Aug 1, 2014

::TUTORIAL::Designer Block Puzzle

You will never believe how many combinations you can get from only 6 simple designs! What would you guess : 100? what about 250? Nope, there are waaaaaaay more combinations than that!

Try wrapping yo head around this: there are OVER 10 MILLION *different* combinations!!! Yes, my friend, you read my typing correctly.

Actually, to be more exact, there are 10,0007600!!!


See the full tutorial on how to make your own! >>> Designer Block Puzzle


http://www.marticesmithart.com/newsletter

Jul 31, 2014

Stampendous Stack Art Challenge and GIVEAWAY

WELCOME to day 5 of the Stampendous Stack Art blog challenge inspiration week! If you're just joining, don't miss the great projects created earlier this week, from some amazing artists. * Full blog hop list is at bottom of this post *

I was invited by Stampendous to play along and I would like to take this time to say THANK YOU!!

Stack Art is a fantastic, project-oriented product for creating place cards, gift tags, mementos, favors and more. So easy and perfect for beginning crafters!

Let me break it down for you:

1. You start with one of the three Stack Art Kraftboard Kits
The Stack Art Kraftboard Kit (kraftboard pieces for 4+ amazing creations; adhesive for all the kraftboard pieces; and sentiments to make each piece special).
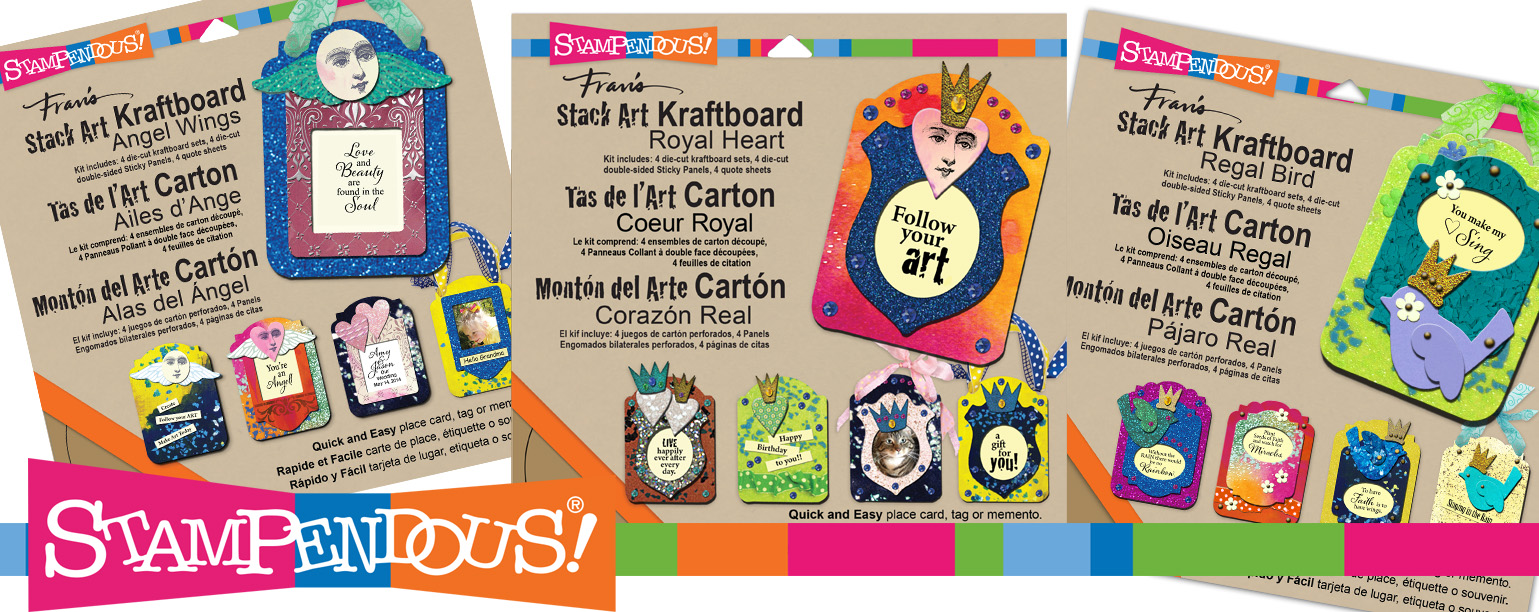
 Stampendous Stack Art Kits


2. Choose your stamp set
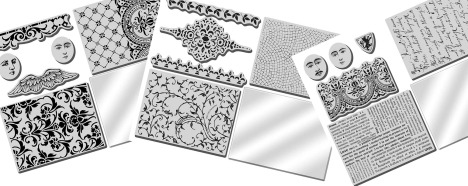
The Stack Art Stamp Sets which include an assortment of terrific background stamps and other images plus an acrylic handle.
Fran's Stack Art Stamp Kits

3. Choose elements kit
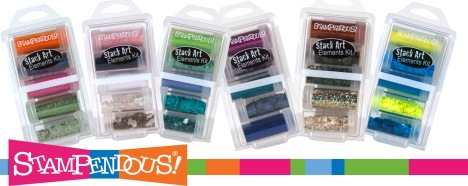
The Stack Art Elements Kits each include five jars of embellishing goodness to stick to your adhesive covered kraftboard pieces.
Fran's Stack Art Stamp Elements


Here's my completed project! My focus was on using what was already on my craft table to create a magnet.

I'll show you just how simple it is to use this kit when you don't have much to work with to create something truly unique and beautiful that will inspire you to keep on creating - with attitude!


Stampendous Stack Art Challenge art by Mixed media artist Martice Smith II

Here's how I created my little art piece: 
I made a simple design by adding white dots, in varying sizes, with the end of a paintbrush handle.

embellish with white dots

Next, each dot was given a 3-D look by creating a small shadow underneath, with a pencil.

add shadows to white dots

Another simple embellishment I added was a string of embroidery floss. Being very careful and only using very small amounts of hot glue, the floss was easily attached.

add embroidery floss to kraftboard piece
(While the hot glue was curing, I went ahead and colored one of the kraftboard pieces with a beautiful yellow ink and distressed the edges with black acrylic paint. --not pictured--)

I set that aside and continued working on the next section. Using one of the sentiments, I applied heavy-bodied white gesso over the words "Follow your" (leaving the word "art" untouched) and colored with oil pastels.

embellish with heavy bodied gesso and oil pastels

Sprinkled on some deep turquoise glitter on to the small crown...what a rich color!

sprinkle on glitter

Using a bookbinding awl, I pierced a whole in the bottom of the kraftboard and inserted a string of vibrant orange embroidery floss with decorative charm.

Next, I glued a heavy-duty magnet and some scrap pieces of matboard to the back of each kraftboard piece.

add embroidery floss with charm; adhere magnet

Finally, I finished the look by scumbling a thin layer of liquid gold leaf (with a paintbrush) onto the surfaces of the kraftboard. 

completed magnet; full view

and here's a final close-up...I love the dimensionality of this! 

completed magnet; detail

Well, that's my inspiration for today! Thanks for visiting :)

supplies I used:
Stack Art Cling Rubber Stamps Royal Heart Kit – SAS03
Stack Art Elements – Sumptuous 5-Jar Kit – EKM03
ColorBox Blends Sunshine ink from Clearsnap
oil pastels
liquid gold leaf
Heavy-duty magnet
embroidery floss
Fluer-de-lis decorative charm


Visit all the blogs below and leave an insightful comment. We’ll give away 3 Stack Art prize packages this week based on your blog comments. Your comments will be your entry into the drawing.
  
I hope you enjoy all the amazing creations of my team mates!

 You're welcome to connect with me via Bloglovin'Facebook, and Flickr

Thank you for your comments!

Day 5 ---- you are here!


Jul 27, 2014

Printmaking Unleashed: Catch up #1!

Hello creative visionaries!!

If you've been following me on my Facebook Art page, you've noticed that I posted days 15-21 (with the exception of days 4 & 16) without links to the corresponding blog posts.

Why have I done that?!
Well, the answer is simple: because I thought I was gonna have some time to write a nice, juicy blog post for each prompt...however, I received some GREAT news concerning my art biz and haven't been able to stay on track, as planned. (Details about the exciting news will be shared in another post, so stay tuned, OK?)


So, today, I will give you a synopsis of the creative prompts, along a short description. Nothing in-depth like the previous ones, but still something to keep your interest.

I hope you enjoy what I've created! Let me know what you think, down in the comment box.


***** I've included a complete list of all the Printmaking Unleashed prompts that I've completed, at the end of this post. *****

By the way, there's still time to follow along, if you wish :)


Off we go!
Day 15 of 31: Black & white art

This is an actual print I created during my undergraduate studies as a printmaker.

I absolutely fell in love with this particular printmaking process! It was very therapeutic for me because the process is sooo repetitive and demanded my full attention. The technique used here is called a "hardground intaglio etching". (The word intaglio is pronounced as 'in-tally-oh')
Martice Smith II; "Lyrical Dawn" (Intaglio hardground etching); featured on Day 15 of Printmaking Unleashed
Intaglio hardground etching, titled "Lyrical Dawn"
You probably would have never thought that "Lyrical Dawn" came from a place of mental anguish and pain, within me.

Not too long before I created this, my Grand Mama V had made her transition into Heaven. I have healed from this, only by the grace of God. He truly is a Comforter for those who are comfortless...

To make a long story short, the concept behind this is about being entrapped, with the only means to escape being in journey of forgiveness and trusting in God.


Day 16: Stencil Print 
Martice Smith II; Day 16 of 31 (Printmaking Unleashed)
I created this postcard for a tutorial called "Packing Tape Postcard". The flower stencil is from Artistcellar's new Pocket Stencils. Isn't it pretty?
*side note: this project has been entered in the New Friday Chevron challenge


Day 17: Free Motion Stitch
Martice Smith II; Day 17 of 31 (Printmaking Unleashed): Free Motion Stitch
::"Dreaming":: Breathing new life into a pile of baby wipes I used to wipe up paint. Watercolor, acrylic paint, cardboard and machine stitching.
Martice Smith II; Day 17 of 31 (Printmaking Unleashed): Free Motion Stitch; detail
close up of cloud and thread. You can also see hand-drawn stars (blue marker)

Martice Smith II; Day 17 of 31 (Printmaking Unleashed): Free Motion Stitch; detail
This is what the back looks like! I thought it looked very interesting with its natural earth tone colors. Looks completely different than the front, don't you think?

Martice Smith II; Day 17 of 31 (Printmaking Unleashed): Free Motion Stitch; detail


Day 18: Acrylic Skin
Martice Smith II; Day 18 of 31 (Printmaking Unleashed): Acrylic Skin
I applied some pink and white acrylic paints onto a plastic sheet and smooshed them together, let dry and peeled them off. I LOVE the marbled look and the unevenness of the texture!

Day 19: Collage  
Using a variety of my handmade stamps, I played around with patterns and complementary color schemes. 
Martice Smith II; Day 19 of 31 (Printmaking Unleashed): Collage
a collage of vintage and notebook  papers, stamped with unique designs. A leaf shape, ornamental shape inspired by Moroccan textiles, arrows, plants and my graffiti script, all combined to create a visual feast of pattern, color and texture!

Day 20: Foam Stamp
Martice Smith II; Day 20 of 31 (Printmaking Unleashed): Foam Stamp collection
a collection of my new foam stamps; fun, fun, fun! Less time consuming to create these compared to carving the rubber block ones.


*** Here's a list of my completed Printmaking Unleashed prompts, as of July 27th ***

Day 1: Found Printing Tools
Day 2: Monoprint
Day 3: Hot Glue Stencil
Day 4: Cardboard Stamp...coming soon!
Day 5: Flower Print
Day 6: Carved Stamp

Day 7: Color Palette
Day 8: Studio Table
Day 9: Art Journal
Day 10: Brayer
Day 11: Pattern

Day 12: Collagraph
Day 13: Doodle
Day 14: Printing Plate...coming soon!


Jul 11, 2014

Organic patterns

Patterns, patterns, patterns!!! I love all kinds of patterns, especially those that are fluid, organic shapes. So raw and natural in form; not too complex (but can be). I often look at nature for inspiration on patterns that resonate within me.  

Architecture is my other favorite place to find the most exquisite designs...which can, actually, be found in nature, too!

Here are a couple of patterns that I've been drawing and painting, repeatedly, in my sketchbook:

Day 11- Pattern; monoprint by Martice Smith II
teardrop-shaped circles and a vintage inspired flower and leaf foam stamps

Day 11- Pattern; monoprint by Martice Smith II
This is a monoprint created with a personal foam stamps. Acrylic paints on paper.

Take a closer look...it's almost hypnotizing! I like following the curvy lines with my eyes.

Day 11- Pattern; monoprint by Martice Smith II

Day 11- Pattern; monoprint by Martice Smith II


http://www.marticesmithart.com/newsletter