Jul 31, 2014

Last day for Printmaking Unleashed challenge

Today is the last day for the printmaking unleashed challenged. I've had so much fun discovering new techniques and just practicing on my skills everyday this month. I will continue challenging myself...one never knows what could come next!

Day 30: Relief Print
I never thought packing peanuts looked so good! Well, as a printing tool...It's funny how I've been finding unconventional objects to use in my printmaking. A valuable lesson and my motto: Use what you already have!

Day 30: Relief Print by Mixed media artist Martice Smith II

And finally...today's last creative prompt: Day 31: hearts + LOVE

Day 31: Hearts + Love by Mixed media artist Martice Smith II
variety of hearts and a lovely sentiment for my followers: Thank you with love & gratitude. Media used: cardboard, acrylics, graphite, stamping, stenciling, machine stitching and Tulip Pearl dimensional paints, Eileen Hull ColorBox Blends (Sunshine) on wrinkled, cotton fabric.

You haven't heard the last of me! Be sure to connect via Bloglovin', Facebook, and Flickr!!
(I'll be updating with the prompts that I've missed...)

THANK YOU!! xox


Stampendous Stack Art Challenge and GIVEAWAY

WELCOME to day 5 of the Stampendous Stack Art blog challenge inspiration week! If you're just joining, don't miss the great projects created earlier this week, from some amazing artists. * Full blog hop list is at bottom of this post *

I was invited by Stampendous to play along and I would like to take this time to say THANK YOU!!

Stack Art is a fantastic, project-oriented product for creating place cards, gift tags, mementos, favors and more. So easy and perfect for beginning crafters!

Let me break it down for you:

1. You start with one of the three Stack Art Kraftboard Kits
The Stack Art Kraftboard Kit (kraftboard pieces for 4+ amazing creations; adhesive for all the kraftboard pieces; and sentiments to make each piece special).
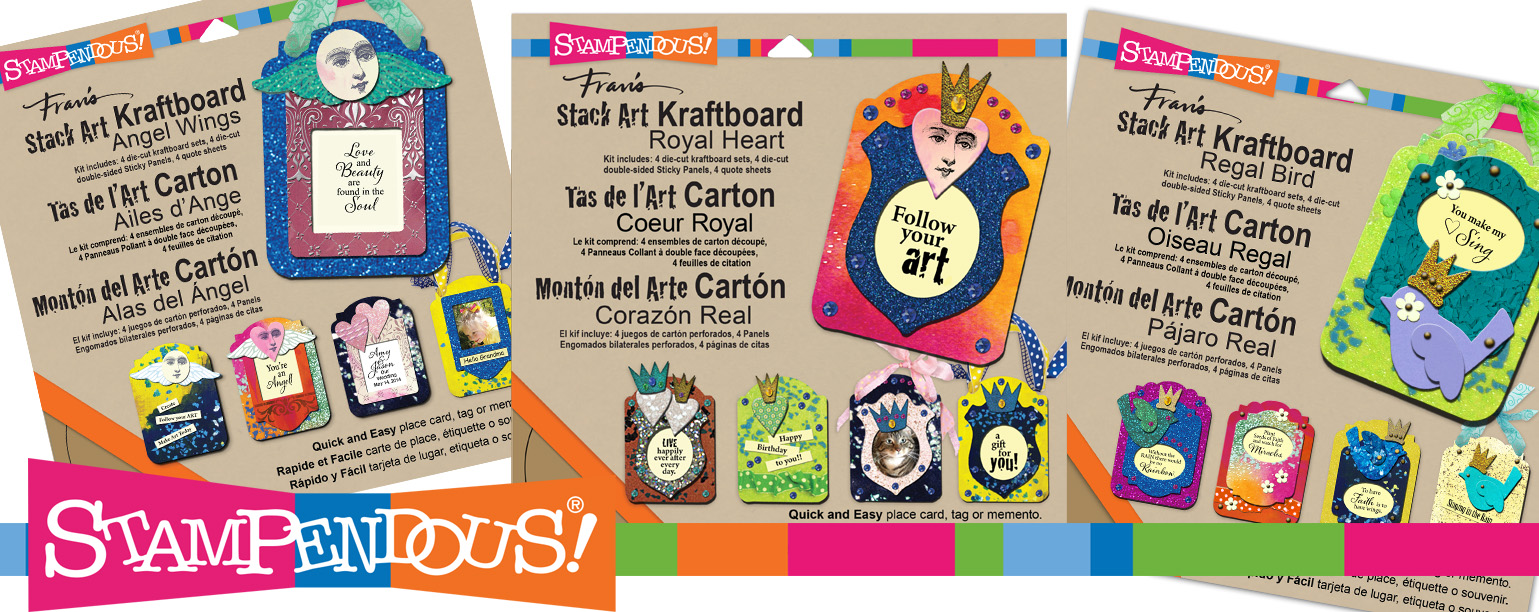
 Stampendous Stack Art Kits


2. Choose your stamp set
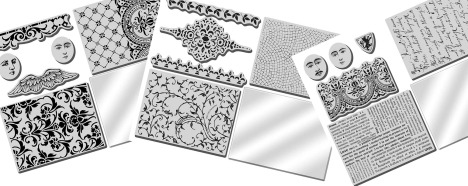
The Stack Art Stamp Sets which include an assortment of terrific background stamps and other images plus an acrylic handle.
Fran's Stack Art Stamp Kits

3. Choose elements kit
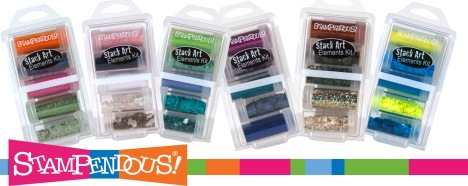
The Stack Art Elements Kits each include five jars of embellishing goodness to stick to your adhesive covered kraftboard pieces.
Fran's Stack Art Stamp Elements


Here's my completed project! My focus was on using what was already on my craft table to create a magnet.

I'll show you just how simple it is to use this kit when you don't have much to work with to create something truly unique and beautiful that will inspire you to keep on creating - with attitude!


Stampendous Stack Art Challenge art by Mixed media artist Martice Smith II

Here's how I created my little art piece: 
I made a simple design by adding white dots, in varying sizes, with the end of a paintbrush handle.

embellish with white dots

Next, each dot was given a 3-D look by creating a small shadow underneath, with a pencil.

add shadows to white dots

Another simple embellishment I added was a string of embroidery floss. Being very careful and only using very small amounts of hot glue, the floss was easily attached.

add embroidery floss to kraftboard piece
(While the hot glue was curing, I went ahead and colored one of the kraftboard pieces with a beautiful yellow ink and distressed the edges with black acrylic paint. --not pictured--)

I set that aside and continued working on the next section. Using one of the sentiments, I applied heavy-bodied white gesso over the words "Follow your" (leaving the word "art" untouched) and colored with oil pastels.

embellish with heavy bodied gesso and oil pastels

Sprinkled on some deep turquoise glitter on to the small crown...what a rich color!

sprinkle on glitter

Using a bookbinding awl, I pierced a whole in the bottom of the kraftboard and inserted a string of vibrant orange embroidery floss with decorative charm.

Next, I glued a heavy-duty magnet and some scrap pieces of matboard to the back of each kraftboard piece.

add embroidery floss with charm; adhere magnet

Finally, I finished the look by scumbling a thin layer of liquid gold leaf (with a paintbrush) onto the surfaces of the kraftboard. 

completed magnet; full view

and here's a final close-up...I love the dimensionality of this! 

completed magnet; detail

Well, that's my inspiration for today! Thanks for visiting :)

supplies I used:
Stack Art Cling Rubber Stamps Royal Heart Kit – SAS03
Stack Art Elements – Sumptuous 5-Jar Kit – EKM03
ColorBox Blends Sunshine ink from Clearsnap
oil pastels
liquid gold leaf
Heavy-duty magnet
embroidery floss
Fluer-de-lis decorative charm


Visit all the blogs below and leave an insightful comment. We’ll give away 3 Stack Art prize packages this week based on your blog comments. Your comments will be your entry into the drawing.
  
I hope you enjoy all the amazing creations of my team mates!

 You're welcome to connect with me via Bloglovin'Facebook, and Flickr

Thank you for your comments!

Day 5 ---- you are here!


Jul 30, 2014

Printmaking Unleashed: Catch up #3!

Hey, hey, heyyyyy! This is the final catch-up post for #printmakingunleashed! Yayyy! I made it all the way through the 31 day challenge. Man, that was kinda intense or what?!

I had a TON of fun, though, so NO complainin' here, my friend. I hope you enjoyed each days' creation.

Please feel free to SHARE to your Pinterest boards, on Facebook, Twitter...whateva social platform you like.


All I ask is that you properly credit me (you'd better know my name, by now! And yes, spelling does count, thank you!) and link back to this blog ( http://www.uneekart.blogspot.com )  
Thank you in advance :)


Day 26: Dimensional paint

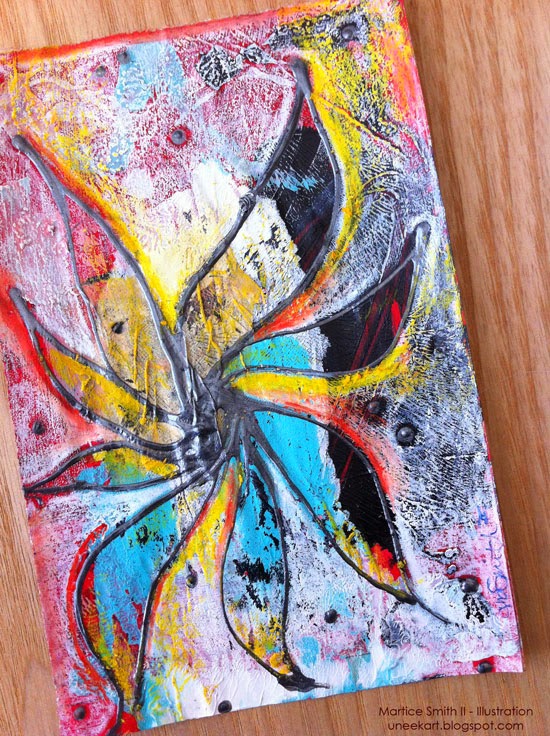
I just love how this turned out! It has a strong tribal feel to it: the colors are so alive and the surface explodes with all kinds of texture...

Intuitive tribal art by Mixed Media Artist Martice Smith II
Media: gelli print with acrylics, oil pastels, white China marker, and dimensional paint on phone book and vintage pattern tissue paper. To me, it looks like a dancing flower!
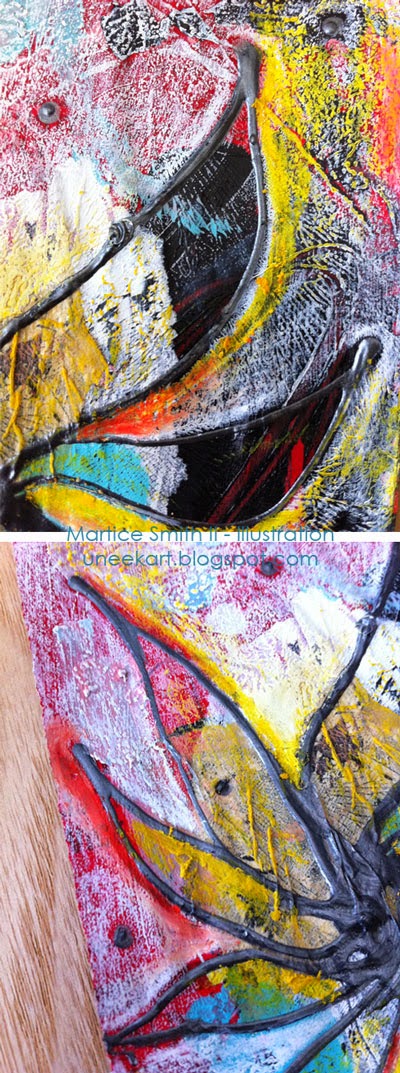
Enjoy the close-ups...

Intuitive tribal art by Mixed Media Artist Martice Smith II

Intuitive tribal art by Mixed Media Artist Martice Smith II

Another one I created for the same prompt (dimensional paint). Bold markings and basic colors...reminds me of the classic style of graphic novels...

Intuitive tribal art by Mixed Media Artist Martice Smith II

Day 27: Feathers
Total time to carve this stamp: 15 minutes...not bad! The more I carve, the better I get!!
Hand carved feather stamp, gelli print and bookmark by Martice Smith II
"Let's Fly"...My hand-carved feather stamp, gelli print and bookmark.

 Day 28: Painted Face

Here's a cute little girl I named "JOY". I created her in Mindy Lacefield's "Sunday Mornings" online class. It's very different from my regular work; a great reason why I took this particular class!  
"JOY", Painted Face example by Mixed Media Artist Martice Smith II
I loved working in this style...primitive, intuitive, loosely painted and drawn; mixed media love! (I'm thinking about adding this cutie to my boutique...what do you think?)

Day 29: Hand Lettered

These are details from "30 Illustrations in 30 Days: A Mixed-Media Artist's Soiree", an illustration challenge I created back in Nov. 2011::::(you can still find each illustration in the archives!) ::::

Hand Lettering examples by Mixed Media Artist Martice Smith II
Featured here are: "Majestic Evolution" & "VIVA!"

Hand Lettering examples by Mixed Media Artist Martice Smith II
from left to right: "Seal Your Destiny with FAITH", "...wings of Nostalgia", and some tickets I created for an art buddy

Only two more days left in the #printmakingUnleashed challenge!!!!
Thank you for cheering me on and leaving so many positive comments :)

Know that I appreciate every word, xoxo


Printmaking Unleashed: Catch up #2!

The journey continues!!

I'm continuing from a previous post, Printmaking Unleashed: Catch up #1!, with short descriptions of each creative prompt. Nothing in-depth like the previous ones, but still something to keep your interest!

 If you are curious about a prompt, please ASK me about it! I'd be glad to share more info...

***** I've included a list of all the Printmaking Unleashed prompts that I've completed, at the end of Printmaking Unleashed: Catch up #1! (Scroll to the bottom, look for the title in RED) *****

Let's get started!

Day 21 of 31: Digital Layers
  
Well, what better project to share than this one?! This is just one of two of my illustrations to get PUBLISHED on the Dan Eldon website for their weekly feature "The Journey is the Inspiration".
Illustration by Martice Smith II. Published on DanEldon.org & Day 21-Printmaking Unleashed
If you haven't read my article, please do so and leave some comment love :)

Day 22: Silkscreen

I love, love, love this technique! I mean, silkscreen/screen printing has been around for ages, ya know? I figured out a really simple and quick way to D.I.Y Silkscreen, with stuff I bet you already have...tutorial coming up!

Items used to create this silkscreen print: 6 inch embroidery hoop, stencil, organza fabric, red acrylic paint, and white china marker.
I used one of my hand-cut stencils as a bold graphic for this blue card. White china marker was used to give the illusion of movement. 
Ooooh, look at that beautiful texture!
another print on cardstock, embellished with Tulip Pearl dimensional paint...


Now, these are my FAVE! Prints that look like tribal markings; very ornate + whimsical...

Stencil used in these silkscreen prints: Art Nouveau from StencilGirl. Cardstock + gelli printed phone book pages with my graffiti...yummy colors, yes please!

Day 23: Markers + Pens

This photo only shows part of my marker, pen + pencil collection...I'm a collector and I get it from my Mama, ha haaa! (We have bundles of 'em, secured with rubber bands...no shame here!) If you're wondering if I ever use all of these, the answer is "YES!"

My favorites are the Sketch and Wash (water soluble pencil), blue fine point Sharpie®, Mickey Mouse pointer, chiseled tip markers and the waterbrush.

Day 24: Painted Fabric
 

Screenprint on vintage fabric by Mixed Media Artist Martice Smith II
Printed on vintage fabric using a silkscreen technique

Day 25: Handmade tool...coming soon!

...Stay tuned, there's more to come...


Jul 27, 2014

Printmaking Unleashed: Catch up #1!

Hello creative visionaries!!

If you've been following me on my Facebook Art page, you've noticed that I posted days 15-21 (with the exception of days 4 & 16) without links to the corresponding blog posts.

Why have I done that?!
Well, the answer is simple: because I thought I was gonna have some time to write a nice, juicy blog post for each prompt...however, I received some GREAT news concerning my art biz and haven't been able to stay on track, as planned. (Details about the exciting news will be shared in another post, so stay tuned, OK?)


So, today, I will give you a synopsis of the creative prompts, along a short description. Nothing in-depth like the previous ones, but still something to keep your interest.

I hope you enjoy what I've created! Let me know what you think, down in the comment box.


***** I've included a complete list of all the Printmaking Unleashed prompts that I've completed, at the end of this post. *****

By the way, there's still time to follow along, if you wish :)


Off we go!
Day 15 of 31: Black & white art

This is an actual print I created during my undergraduate studies as a printmaker.

I absolutely fell in love with this particular printmaking process! It was very therapeutic for me because the process is sooo repetitive and demanded my full attention. The technique used here is called a "hardground intaglio etching". (The word intaglio is pronounced as 'in-tally-oh')
Martice Smith II; "Lyrical Dawn" (Intaglio hardground etching); featured on Day 15 of Printmaking Unleashed
Intaglio hardground etching, titled "Lyrical Dawn"
You probably would have never thought that "Lyrical Dawn" came from a place of mental anguish and pain, within me.

Not too long before I created this, my Grand Mama V had made her transition into Heaven. I have healed from this, only by the grace of God. He truly is a Comforter for those who are comfortless...

To make a long story short, the concept behind this is about being entrapped, with the only means to escape being in journey of forgiveness and trusting in God.


Day 16: Stencil Print 
Martice Smith II; Day 16 of 31 (Printmaking Unleashed)
I created this postcard for a tutorial called "Packing Tape Postcard". The flower stencil is from Artistcellar's new Pocket Stencils. Isn't it pretty?
*side note: this project has been entered in the New Friday Chevron challenge


Day 17: Free Motion Stitch
Martice Smith II; Day 17 of 31 (Printmaking Unleashed): Free Motion Stitch
::"Dreaming":: Breathing new life into a pile of baby wipes I used to wipe up paint. Watercolor, acrylic paint, cardboard and machine stitching.
Martice Smith II; Day 17 of 31 (Printmaking Unleashed): Free Motion Stitch; detail
close up of cloud and thread. You can also see hand-drawn stars (blue marker)

Martice Smith II; Day 17 of 31 (Printmaking Unleashed): Free Motion Stitch; detail
This is what the back looks like! I thought it looked very interesting with its natural earth tone colors. Looks completely different than the front, don't you think?

Martice Smith II; Day 17 of 31 (Printmaking Unleashed): Free Motion Stitch; detail


Day 18: Acrylic Skin
Martice Smith II; Day 18 of 31 (Printmaking Unleashed): Acrylic Skin
I applied some pink and white acrylic paints onto a plastic sheet and smooshed them together, let dry and peeled them off. I LOVE the marbled look and the unevenness of the texture!

Day 19: Collage  
Using a variety of my handmade stamps, I played around with patterns and complementary color schemes. 
Martice Smith II; Day 19 of 31 (Printmaking Unleashed): Collage
a collage of vintage and notebook  papers, stamped with unique designs. A leaf shape, ornamental shape inspired by Moroccan textiles, arrows, plants and my graffiti script, all combined to create a visual feast of pattern, color and texture!

Day 20: Foam Stamp
Martice Smith II; Day 20 of 31 (Printmaking Unleashed): Foam Stamp collection
a collection of my new foam stamps; fun, fun, fun! Less time consuming to create these compared to carving the rubber block ones.


*** Here's a list of my completed Printmaking Unleashed prompts, as of July 27th ***

Day 1: Found Printing Tools
Day 2: Monoprint
Day 3: Hot Glue Stencil
Day 4: Cardboard Stamp...coming soon!
Day 5: Flower Print
Day 6: Carved Stamp

Day 7: Color Palette
Day 8: Studio Table
Day 9: Art Journal
Day 10: Brayer
Day 11: Pattern

Day 12: Collagraph
Day 13: Doodle
Day 14: Printing Plate...coming soon!


Jul 22, 2014

TUTORIAL ::Chevron Stamp::

Hi everyone! Here's a really simple tutorial on how I created my large chevron stamp.

Just a heads up: This one took a good 30 minutes to carve. Make sure you have time to do this - you will not want to rush doing this project!

TUTORIAL:: Chevron Stamp by Martice Smith II

Here's what you'll need:   
Linoleum / rubber stamp carving kit
Metal ruler
Utility Knife
Pen / Pencil
Self-healing cutting mat

TUTORIAL:: Chevron Stamp supplies by Martice Smith II

STEP 1:: Cut rubber block to your desired size.
For my large chevron stamp, I cut an 8 inch by 3 1/4 inch rectangle.

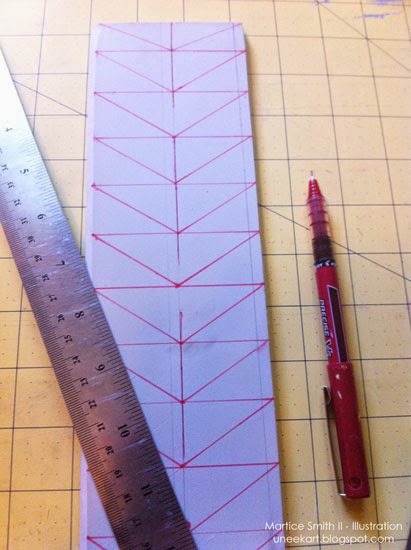
STEP 2:: Using a metal ruler and pencil / pen, determine the angle.
Draw a line down the center of block.
Next, draw perpendicular lines (the horizontal ones).
(My lines are 1 inch spaced apart.)

TIP: The further apart the lines are, the steeper the chevron angle.

TUTORIAL:: Chevron Stamp by Martice Smith II

STEP 3:: Use your metal ruler to connect the outside corners on each side of the block to the center, vertical line. These lines will form the letter "V".

STEP 4:: Roughly color in which parts of the stamp image WILL NOT be cut away.
(Do you like your image so far? If yes, you're ready to cut! If no, go ahead and tweak it until you like it.)

TUTORIAL:: Chevron Stamp by Martice Smith II

STEP 5:: Start cutting!
Using your linoleum cutters, trim away everything that isn't colored in.
TIP: use the metal ruler as a guide to help you cut super straight lines. 

TUTORIAL:: Chevron Stamp by Martice Smith II

STEP 6:: Test printing
Roll out some ink and do a test print of your stamp.

TUTORIAL:: Chevron Stamp by Martice Smith II

TUTORIAL:: Chevron Stamp by Martice Smith II
Look how straight those lines are! All thanks to my trusty metal ruler... :)

~~ Here's an example of how I used an 
alternating chevron pattern to 
create a unique postcard ~~
TUTORIAL:: Chevron Stamp by Martice Smith II
This postcard features a hand-carved chevron stamp, image transfer using package tape, a stenciled flower (using Artistcellar's new Pocket Stencil), and my graffiti handwriting on brown kraft paper.

See how easy this was?! After this tutorial, I carved three more...I'll update this post with photos of them, so please be sure to come back!

UPDATE: here are three more chevron patterns!

TUTORIAL:: Alternating Chevron Stamps by Martice Smith II

TUTORIAL:: Alternating Chevron Stamps by Martice Smith II

TUTORIAL:: Alternating Chevron Stamps by Martice Smith II

TUTORIAL:: Alternating Chevron Stamps by Martice Smith II
side view of stamp; see how thick the rubber block is?! This is how I could use BOTH sides.

TUTORIAL:: Alternating Chevron Stamps by Martice Smith II
Remember, if your block is thick enough, you can use both sides - just like I did with this one.

I really hope my tutorial has inspired you to create your own! Commercial stamps are fine to use, sometimes, but I love the handmade character from making my own.

Go ahead and try carving one (or three!) and add a link to your photo. I'd love to see it!

*side note: this post has been entered in the New Friday Chevron challenge

Martice Smith ART newsletter (http://www.marticesmithart.com/newsletter)